
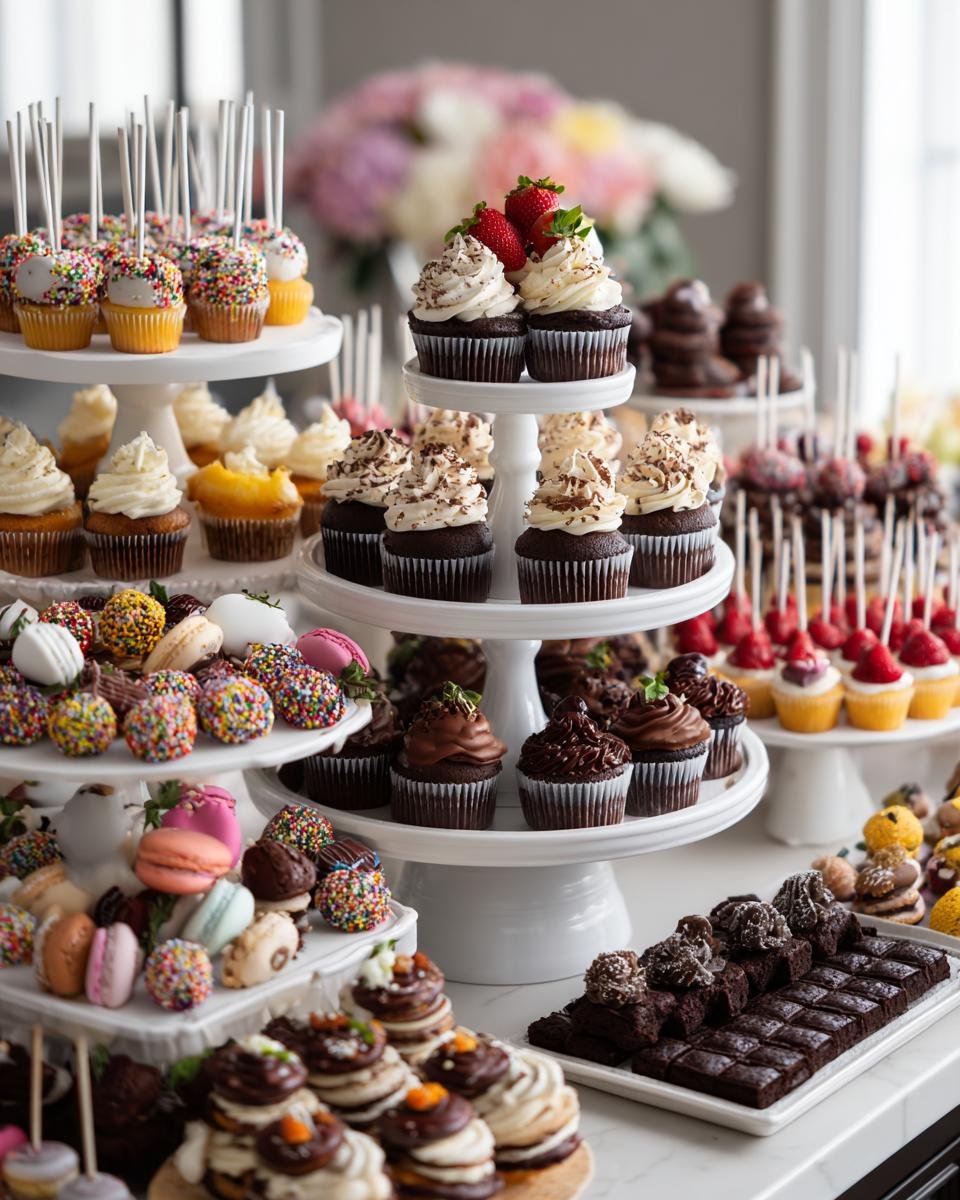
Oh, let me tell you, there’s nothing quite like a stunning wedding dessert table to make your guests go “Wow!” I still remember the first time I put one together for my sister’s wedding—people couldn’t stop raving about it, and honestly? It’s one of the easiest ways to add that extra special touch to your big day. The key is variety and visual appeal—think tiered stands piled with cupcakes, delicate macarons, chocolate-dipped strawberries, and those adorable mini cheesecakes that disappear in two bites.
Trust me, when you see your guests’ faces light up as they hover around that table, picking their favorites, it’s pure magic. And the best part? You don’t need to be a professional pastry chef to pull it off. A little planning, some pretty platters, and a mix of textures and flavors will do the trick. Just make sure everything’s bite-sized—nobody wants to juggle a plate and a champagne glass!
I’ve learned a few tricks over the years, like labeling each dessert (because Aunt Linda *will* ask what’s in the raspberry macaron) and keeping a few backups in the kitchen for refills. Seriously, a well-stocked wedding dessert table is the secret to happy, sugar-fueled dancing all night long.
Why You’ll Love This Wedding Dessert Table
This wedding dessert table isn’t just pretty—it’s a total crowd-pleaser, and here’s why:
- Something for everyone: Chocolate lovers, fruit fans, vanilla devotees—no guest gets left out.
- Instagram-worthy: Tiered stands and colorful treats make it a focal point (trust me, phones will come out).
- Easy mingling: Bite-sized desserts mean no forks needed—just grab and go!
- Pure joy: There’s nothing like watching your grandma sneak a second cake pop when she thinks no one’s looking.
Seriously, this spread turns “just dessert” into a full-on experience.
Ingredients for Your Wedding Dessert Table
Alright, let’s get down to the sweet details! Here’s exactly what you’ll need to create that dreamy wedding dessert table—with measurements so precise even my perfectionist aunt would approve:
- 1 batch of chocolate cupcakes (24 count, standard size—none of those skimpy mini ones!)
- 1 batch of vanilla cupcakes (24 count, with a touch of almond extract for that extra “Mmm”)
- 1 batch of macarons (30 pieces, assorted flavors—go wild with raspberry, pistachio, and salted caramel)
- 1 batch of mini cheesecakes (24 count, in muffin liners for easy grabbing)
- 12 chocolate-covered strawberries (halved—trust me, they’ll stretch further without skimping on elegance)
- 1 batch of decorated sugar cookies (30 pieces, match your wedding colors with royal icing)
- 1 batch of cake pops (36 pops, vanilla and chocolate—dip them in gold sprinkles for a luxe touch)
- 1 batch of brownie bites (48 pieces, because people will sneak thirds when you’re not looking)
- 1 batch of fruit tarts (24 mini tarts, seasonal berries for that fresh pop of color)
Ingredient Notes and Substitutions
Got dietary restrictions? No problem! Here’s how to tweak things without losing an ounce of deliciousness:
- Gluten-free: Swap regular flour for a 1:1 gluten-free blend in cupcakes and cookies (I love Bob’s Red Mill for foolproof results).
- Dairy-free: Use coconut milk in cheesecakes and vegan butter for frosting—guests won’t even notice the difference.
- Nut allergies: Skip almond extract in vanilla cupcakes and opt for sunflower seed butter in cookies.
- Less sugar: Reduce frosting amounts by half and let the natural sweetness of fruit tarts shine.
Pro tip: Label substitutions clearly—your gluten-free cousin will hug you for it!
How to Assemble Your Wedding Dessert Table
Okay, here’s where the magic happens! Assembling your wedding dessert table is like creating edible art—but don’t worry, I’ll walk you through each step so it’s stress-free and stunning.
Step 1: Bake and Prep Desserts in Advance
First rule: don’t leave baking for the wedding day! Most desserts taste better 1-2 days later anyway. Cupcakes? Bake them Thursday for a Saturday wedding. Cheesecakes? They need that overnight chill time to set perfectly. Store everything airtight—cookies in tins, cupcakes under domes, and anything fragile (looking at you, macarons) in single layers with parchment between them. Pro tip: freeze cake pops upright in styrofoam blocks to prevent smudged coatings!
Step 2: Arrange for Visual Impact
Now for the fun part! Start with tiered stands at different heights—it creates that “wow” factor. Place heavier items like cheesecakes on bottom tiers, delicate macarons up top. Group by color: maybe vanilla cupcakes with white chocolate-dipped strawberries on one side, chocolate treats on the other. Leave space between items so it looks abundant, not cluttered. Oh, and tuck some fresh mint leaves here and there—that pop of green makes everything look gourmet!
Step 3: Add Labels and Decorations
Little details make a big difference. Handwrite or print small cards (“Salted Caramel Macaron • Gluten-Free”) in your wedding font—place them in tiny holders so guests know what they’re grabbing. Weave ribbon through the stands that matches your color scheme. For summer weddings, add edible flowers; for winter, sprinkle fake snow around the base. My secret? A small framed sign saying “Sweet Love” ties the whole wedding dessert table together beautifully!
Tips for a Perfect Wedding Dessert Table
Want your wedding dessert table to be the talk of the reception? Here are my hard-earned secrets:
- Assign a dessert guardian: Pick a cousin or bridesmaid to discreetly refill plates and wipe stray frosting smudges.
- Beat the melt: Keep chocolate-dipped treats away from warm spotlights—I learned this the messy way at a July wedding!
- Double the backups: Hide extra cupcakes in the kitchen—you’d be shocked how fast 24 vanish when dancing starts.
- Early bird bonus: Set up the table before dinner service so photographers can capture it pristine.
Trust me, these little touches make all the difference between “nice” and “unforgettable.”
Wedding Dessert Table Variations
Oh, the possibilities are endless when it comes to customizing your wedding dessert table! For summer weddings, swap those brownie bites for lemon bars and pile the table with fresh berry tarts—the bright colors just scream sunshine. Winter couples? Peppermint bark, spiced gingerbread cookies, and eggnog-flavored cupcakes will have everyone feeling cozy.
Want a cultural twist? Italian weddings can feature mini cannoli and tiramisu cups, while a Mexican fiesta calls for churro bites and tres leches shooters. My personal favorite? A “his and hers” table with his favorite bourbon pecan tarts next to her beloved white chocolate raspberry macarons. The key is matching the treats to your personality—because nothing says “us” like dessert!
Serving and Storing Your Wedding Dessert Table
Here’s the real secret to keeping your wedding dessert table looking (and tasting) perfect all night: timing is everything! Most desserts can stay out safely for 2-3 hours—just tuck a few ice packs under platters with creamy treats like cheesecakes. Have your assigned “dessert helper” do quick refills every 30 minutes—nothing kills the vibe like empty spots where the cake pops used to be!
For leftovers? Pack them in bakery boxes (get cute ones from the craft store!) and send them home with guests or bridal party members. Anything fragile like macarons? Freeze them in single layers—they’ll taste fresh for weeks when thawed slowly in the fridge. Just don’t forget to stash a few goodies for yourself… you’ve earned them after all that planning!
Nutritional Information
Just a quick note—nutritional values here are rough estimates since ingredients and brands vary (and let’s be real, nobody’s counting calories at a wedding!). Everything’s portioned as bite-sized treats, so guests can indulge without overdoing it. Dietary swaps like gluten-free flour or dairy alternatives will adjust numbers slightly. Enjoy guilt-free!
Frequently Asked Questions
Over the years, I’ve gotten so many questions about wedding dessert tables—here are the ones that pop up most often (and my tried-and-true answers)!
How far in advance can I bake desserts?
Most treats freeze beautifully! Cupcakes and cookies last 1-2 months frozen (unfrosted), while cheesecakes and brownies hold up for 3 weeks. Thaw overnight in the fridge, then decorate fresh. Macarons? Bake the shells a month ahead, but fill them just 2 days before—they get soggy otherwise. Pro tip: label everything with dates so you don’t accidentally serve Christmas cookies at your summer wedding!
Can I make desserts gluten-free?
Absolutely! Use a 1:1 gluten-free flour blend for cupcakes and cookies—they’ll taste nearly identical. For macarons, almond flour is naturally GF (just check for cross-contamination warnings). Skip graham cracker crusts on cheesecakes—crushed gluten-free cookies work perfectly. Always label GF items clearly—guests with allergies will be so grateful!
How much dessert per guest?
Plan for 2-3 pieces per person—trust me, people sample more than you’d think! For 100 guests, that’s 200-300 total treats. Mix sizes: small items like cake pops count as one, while halved strawberries or petite tarts can be half. And don’t forget vendor boxes for photographers and DJs—they deserve sweets too!
How do I keep desserts fresh during the reception?
Rotate platters! Keep backups chilled in the kitchen and swap them out every hour. For outdoor weddings, use cloches or mesh domes to protect against bugs (learned that one the hard way). Cream-based desserts? Nest their stands in bowls of ice—it’s a game-changer!
Got more questions? Snap pics of your setup and tag me—I love seeing how creative couples get with their dessert tables!
Print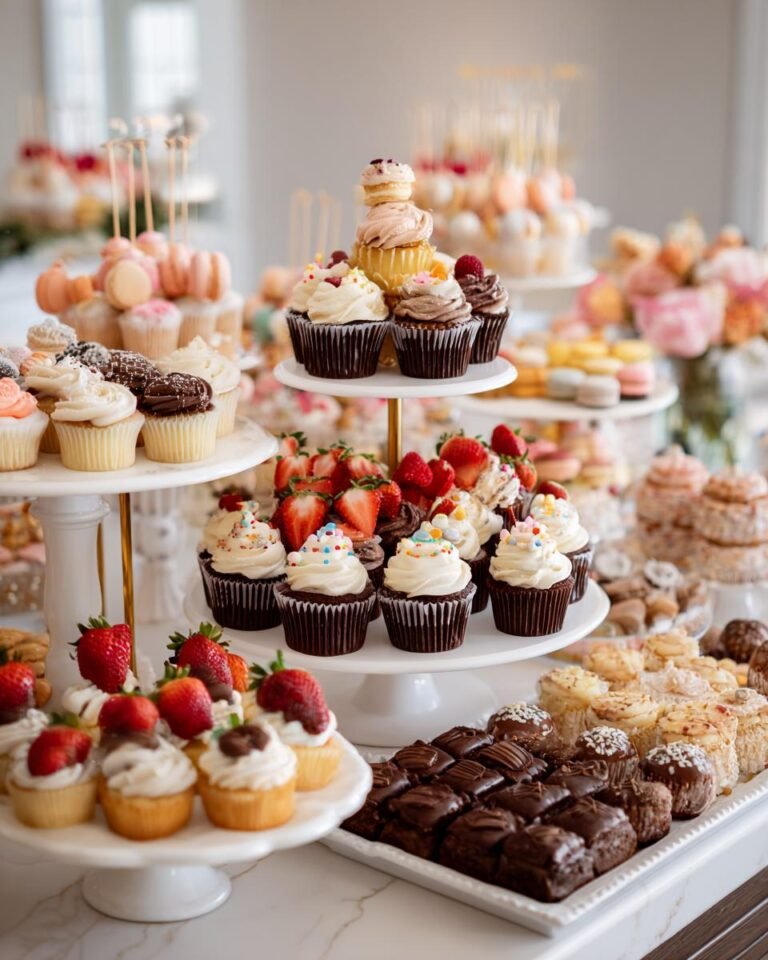
Stunning Wedding Dessert Table – 10 Irresistible Treats Inside
A beautifully arranged wedding dessert table featuring a variety of sweet treats to delight your guests.
- Total Time: 6 hours
- Yield: Serves 100 guests 1x
Ingredients
- 1 batch of chocolate cupcakes
- 1 batch of vanilla cupcakes
- 1 batch of macarons (assorted flavors)
- 1 batch of mini cheesecakes
- 1 batch of chocolate-covered strawberries
- 1 batch of sugar cookies (decorated)
- 1 batch of cake pops (assorted flavors)
- 1 batch of brownie bites
- 1 batch of fruit tarts
Instructions
- Bake all desserts at least one day before the wedding.
- Arrange desserts on tiered stands and platters for visual appeal.
- Label each dessert with small cards for guests to identify flavors.
- Set up the dessert table in a visible and accessible area.
- Add decorative elements like flowers or ribbons to match the wedding theme.
- Keep desserts fresh by storing them properly until serving time.
- Refill the table as needed during the reception.
Notes
- Choose desserts that suit the season and wedding theme.
- Consider dietary restrictions and provide gluten-free or vegan options.
- Keep desserts bite-sized for easy serving.
- Use sturdy stands to prevent accidents.
- Assign someone to monitor and replenish the dessert table.
- Prep Time: 4 hours
- Cook Time: 2 hours
- Category: Dessert
- Method: Baking
- Cuisine: International
- Diet: Vegetarian
Nutrition
- Serving Size: 1 piece
- Calories: 150
- Sugar: 10g
- Sodium: 50mg
- Fat: 5g
- Saturated Fat: 2g
- Unsaturated Fat: 2g
- Trans Fat: 0g
- Carbohydrates: 20g
- Fiber: 1g
- Protein: 2g
- Cholesterol: 15mg
Keywords: wedding desserts, dessert table, sweet treats, party desserts