Oh my goodness, do I have a treat for you! Picture this: a wooden board overflowing with juicy strawberries, chocolate-drizzled pretzels, and little pools of caramel just begging for a cookie to take a dip. That’s my go-to dessert charcuterie board, and trust me, it’s been the star of every party I’ve thrown. No baking, no stress—just pure, delightful chaos of sweet flavors and textures. I started making these boards when my niece’s birthday party turned into a last-minute disaster (long story), and now? They’re my secret weapon for impressing guests without breaking a sweat. Whether it’s a girls’ night, holiday gathering, or just a Tuesday, this board turns ordinary treats into something magical. You’re gonna love it!
Why You’ll Love This Dessert Charcuterie Board
Okay, let me count the ways this board will become your new party hero:
- Effortless elegance: No baking, no fuss—just pile on your favorite sweets and watch jaws drop.
- Total customization: Swap in whatever makes your heart sing (leftover Halloween candy? Yes please!).
- Instant crowd-pleaser: Picky eaters? Dietary restrictions? This board’s got options for everyone.
- Bonus points: The Instagram-worthy presentation practically guarantees compliments.
Seriously, it’s like edible confetti—pure joy on a plank!
Ingredients for Your Dessert Charcuterie Board
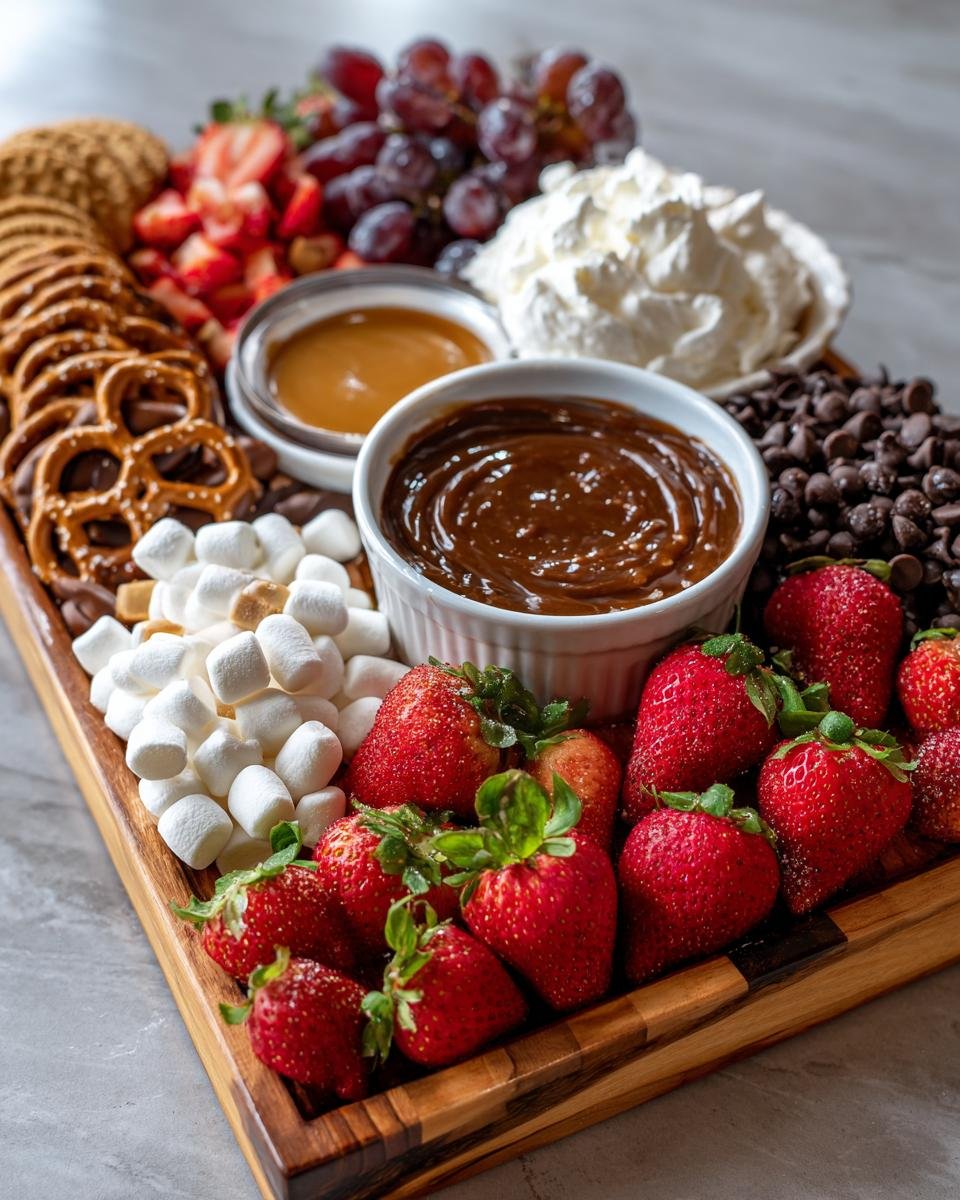
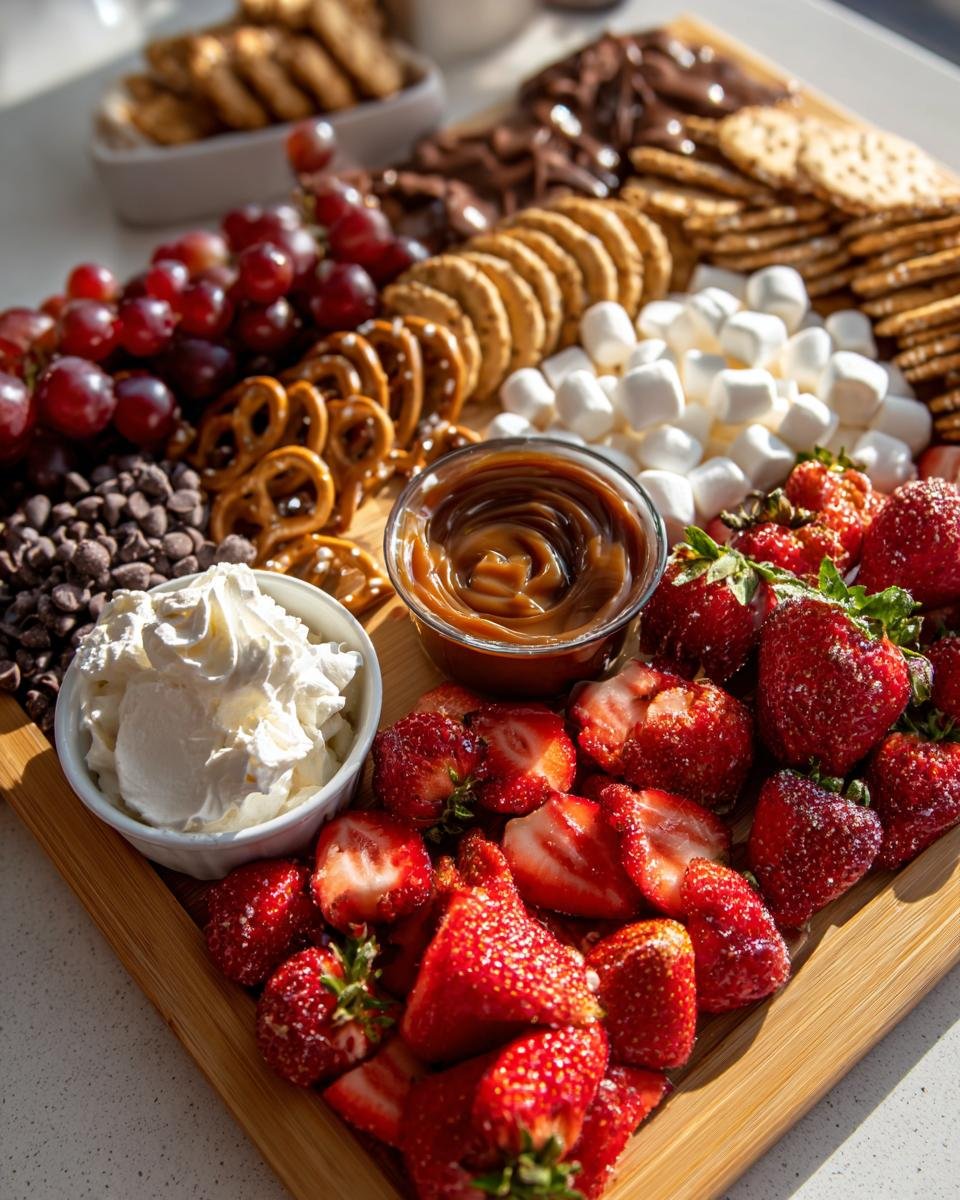
Alright, let’s talk ingredients—the colorful cast of characters that’ll make your board shine! I like to think of them in three tasty categories: the fresh pops, the crunchy bites, and the dreamy dippers. Here’s what you’ll need:
- Fresh & Juicy: 1 cup strawberries (sliced), 1 cup grapes (I love mixing red and green for color)
- Sweet & Crunchy: 1 cup chocolate-covered pretzels, 1 cup assorted cookies (shortbread and chocolate chip are my faves)
- Dippable Delights: 1/2 cup chocolate chips, 1/2 cup caramel sauce (warmed slightly so it flows like lava), 1/2 cup whipped cream
- Bonus Fluff: 1 cup mini marshmallows—because what’s a dessert board without pillowy clouds of sugar?
Pro tip: Raid your pantry first! Half the fun is using what you’ve got—those leftover holiday chocolates? Perfect. Stale cookies? Dunk ’em in sauce and call it a feature!
How to Assemble a Dessert Charcuterie Board
Alright, let’s get this sweet masterpiece together! I’ve learned through many (many) trial runs that the secret is all in the assembly. Follow these steps, and you’ll have a board that looks like it came straight from a fancy bakery—but with half the effort.
Step 1: Prepare Your Board and Bowls
First things first—grab that wooden board you’ve been saving for “something special.” (This is that something!) Give it a quick wipe if needed, then place 2-3 small bowls around the edges for your sauces. I like using little ramekins, but teacups or even shot glasses work in a pinch! Pro tip: Warm the caramel sauce for 10 seconds in the microwave so it pours like liquid gold.
Step 2: Arrange Fruits and Sweets
Now the fun begins! Start with your fruits—I pile the strawberries in one corner and let the grapes cascade down the side like edible jewels. Next, group your cookies and pretzels in little clusters. Don’t be too neat here—organic piles look way more inviting than straight lines. Leave some breathing room between sections; we’ll fill those gaps in a sec.
Step 3: Fill Gaps and Final Touches
Time for the magic fillers! Scatter chocolate chips like confetti between your larger items. Toss in mini marshmallows wherever you see empty spots—they’re the edible version of decorative pillows. Finally, drizzle any extra caramel over the pretzels for that “chef’s kiss” effect. If you’re serving later, pop it in the fridge for 15 minutes (but no longer, or the cookies get sad). And voilà—you’ve just created sweet harmony on a board!
Tips for the Perfect Dessert Charcuterie Board
After assembling more boards than I can count (and taste-testing every crumb), here are my go-to tricks for dessert charcuterie success:
- Seasonal is sensational: Swap strawberries for sliced peaches in summer or pomegranate seeds in winter—nature’s candy always shines brightest in season.
- Nut-free? No problem! Use sunflower seed butter cups or tahini-drizzled dates for that rich, nutty vibe without the allergens.
- Chill wisely: Pop the board in the fridge for 10 minutes before serving if your kitchen’s warm, but pull it out 5 minutes early so the chocolate doesn’t sweat.
- The toothpick trick: Stick a few in grapes and marshmallows—suddenly it’s fancy finger food that won’t sticky up your guests’ hands!
Remember: the messier it looks while assembling, the more irresistible it becomes. Trust me on this!
Variations for Your Dessert Charcuterie Board
Here’s the beauty of this board—it’s basically a blank canvas for your sweet tooth! Swap strawberries for dried mango slices when fresh fruit’s scarce, or trade caramel sauce for salted honey if you’re feeling fancy. Got leftover holiday chocolates? Toss ’em on! For themed parties, use heart-shaped cookies for Valentine’s Day or orange-and-black treats for Halloween. My wildest creation? A s’mores board with graham crackers, chocolate bars, and a mini torch—total game-changer!
Serving and Storing Your Dessert Charcuterie Board
When it’s time to serve, do it with flair! Let the board sit at room temperature for about 5 minutes if you’ve chilled it—this keeps the chocolate from getting too hard and the cookies from losing their crunch. If you’re not serving right away, cover it loosely with plastic wrap and pop it in the fridge, but don’t leave it longer than an hour or the cookies might get soggy. Trust me, this board is best enjoyed fresh, so gather your guests and dig in while it’s at its peak!
Dessert Charcuterie Board Nutritional Information
Now, let’s be real—this is a dessert board, so we’re not exactly counting celery sticks here! A typical serving (about a sixth of the board) lands around 250 calories, with 20g of sugar from all that fruity, chocolatey goodness. But listen, these numbers dance around based on what you pile on—swap in dark chocolate and berries, and you’re looking at a slightly lighter treat. My philosophy? Life’s too short not to lick the caramel bowl!
Frequently Asked Questions
Can I prepare my dessert charcuterie board ahead of time?
You bet! Assemble everything except the sauces about an hour before serving—just add those last-minute so your cookies stay crisp. If you need longer prep, keep fruits washed and sliced in separate containers, then arrange quickly before guests arrive.
What other fruits work well besides strawberries and grapes?
Oh, let me count the ways! Sliced kiwi adds a tropical pop, blackberries bring drama with their deep color, and apple slices (tossed in lemon juice) stay crunchy. For fancy occasions, fresh figs or persimmons make it look extra special.
Help! I forgot bowls for sauces—any creative solutions?
Been there! Use hollowed-out orange halves, small spoons stuck directly into caramel jars, or even clean seashells for a beachy vibe. One time I used an ice cube tray flipped upside down—guests thought it was genius!
How do I keep everything from sliding around when carrying the board?
Ah, the great dessert board shuffle! Place a damp kitchen towel underneath—it acts like grip tape. For really loaded boards, assemble on a baking sheet first, then transfer to your pretty platter right before serving.
Can this work for nut allergies?
Absolutely! Skip the obvious nutty items and check labels on chocolates/cookies. Sunflower seed butter cups or coconut clusters give that satisfying crunch without worry. Always let guests know about ingredients—better safe than sorry!
Share Your Dessert Charcuterie Board Creation
Now I want to see your edible masterpieces! Snap a pic of your dessert board and tag me—I’ll be swooning over your creations with a caramel-dipped spoon in hand. Happy arranging, sweet friends!
Print
10 Irresistible Dessert Charcuterie Board Ideas to Wow Your Guests
A fun and creative dessert charcuterie board with a mix of sweet treats for any occasion.
- Total Time: 15 mins
- Yield: 6 servings 1x
Ingredients
- 1 cup strawberries, sliced
- 1 cup grapes
- 1 cup chocolate-covered pretzels
- 1 cup mini marshmallows
- 1 cup assorted cookies
- 1/2 cup chocolate chips
- 1/2 cup caramel sauce
- 1/2 cup whipped cream
Instructions
- Arrange a large wooden board or platter.
- Place small bowls for sauces like caramel and whipped cream.
- Group fruits, chocolates, and cookies in separate sections.
- Fill gaps with smaller items like chocolate chips and pretzels.
- Serve immediately or chill briefly before serving.
Notes
- Use seasonal fruits for freshness.
- Add nuts if allergies aren’t a concern.
- Keep refrigerated if not serving right away.
- Prep Time: 15 mins
- Cook Time: 0 mins
- Category: Dessert
- Method: No-Cook
- Cuisine: American
- Diet: Vegetarian
Nutrition
- Serving Size: 1 serving
- Calories: 250
- Sugar: 20g
- Sodium: 100mg
- Fat: 10g
- Saturated Fat: 5g
- Unsaturated Fat: 4g
- Trans Fat: 0g
- Carbohydrates: 35g
- Fiber: 3g
- Protein: 2g
- Cholesterol: 5mg
Keywords: dessert board, sweet charcuterie, party snacks, no-bake dessert