
Oh, Oreo desserts! Just saying those words makes me smile. They were practically a food group in my house growing up – my mom would whip up this magical no-bake Oreo dessert whenever we had surprise guests or just needed a little pick-me-up. The best part? Even as a kid, I could help make it (though I’ll admit I “helped” by sneaking extra cookie crumbles when Mom wasn’t looking).
What I love about this Oreo dessert is how ridiculously easy it is while still feeling special. No oven required, just some simple mixing and chilling, and boom – you’ve got this creamy, crunchy, chocolatey masterpiece. It’s the dessert that somehow works for everything from casual weeknights to birthday parties, and the recipe is so forgiving you can tweak it a million ways (I’ll share all my favorite variations later!).
Honestly, I still make this for my own family now, and their faces light up just like mine used to. That’s the power of an Oreo dessert – simple ingredients transformed into pure happiness. Let me show you how to make the version that’s been making people smile in my kitchen for decades.
Why You’ll Love This Oreo Dessert
This Oreo dessert is one of those recipes you’ll keep coming back to, and here’s why:
- Quick and easy: No baking required, just mix, assemble, and chill. Perfect for when you’re short on time but still want something impressive.
- Crowd-pleaser: Let’s be honest—who doesn’t love Oreos? This dessert is a guaranteed hit with kids and adults alike.
- Versatile: You can tweak it to your taste—add mint extract, swap in peanut butter Oreos, or top it with chocolate ganache for extra decadence.
- Perfect for any occasion: Whether it’s a weeknight treat, a potluck, or a party, this dessert always fits the bill.
Trust me, once you try it, this Oreo dessert will become a go-to in your recipe collection.
Ingredients for the Perfect Oreo Dessert
Here’s what you’ll need to create this dreamy Oreo dessert. Trust me, keeping things simple is key—no fancy ingredients here, just pure deliciousness!
- 24 Oreo cookies: You’ll use 20 for the base and save 4 for topping.
- 1 cup heavy cream, chilled: Cold cream whips up better, so don’t skip the chill!
- 1/2 cup powdered sugar, sifted: Sifting keeps it smooth and lump-free.
- 1 tsp vanilla extract: Pure vanilla adds that warm, cozy flavor.
- 1/2 cup cream cheese, softened: Room temperature cream cheese mixes in perfectly—no lumps here!
That’s it! Just a handful of ingredients, but together they create something magical. Now, let’s get to the fun part—putting it all together!
Equipment You’ll Need for This Oreo Dessert
Don’t worry—you probably already have everything you need to make this Oreo dessert! Here’s the short and sweet list:
- 9×9-inch baking dish: Or any similar-sized dish for that perfect layer thickness
- Mixing bowls: One for the cream cheese mixture, one for whipping cream
- Hand mixer or stand mixer: Makes whipping the cream a breeze
- Spatula: For folding and spreading all that creamy goodness
- Ziplock bag and rolling pin: My favorite combo for crushing those Oreos without making a mess!
See? Nothing complicated—just simple tools for a seriously delicious dessert!
How to Make the Best Oreo Dessert
Alright, let’s get to the fun part—making this irresistible Oreo dessert! I’ll walk you through every step, and trust me, it’s easier than you think. Just follow along, and you’ll have a show-stopping dessert in no time.
- Crush those Oreos: Start by taking 20 Oreo cookies and crushing them into fine crumbs. I like using a Ziplock bag and a rolling pin—it’s quick, easy, and keeps the mess to a minimum. Mix the crumbs with melted butter (about 3-4 tablespoons) and press them firmly into the bottom of your 9×9-inch dish. This is your base, so make sure it’s nice and even!
- Whip the cream: In a large mixing bowl, pour in your chilled heavy cream. Use a hand mixer or stand mixer to whip it until stiff peaks form. This is key—you want it to hold its shape when you lift the beaters. Pro tip: chill your bowl and beaters beforehand for even better results!
- Mix the cream cheese: In another bowl, beat the softened cream cheese, powdered sugar, and vanilla extract until it’s smooth and creamy. No lumps allowed here! If your cream cheese is still a bit cold, just keep mixing—it’ll get there.
- Fold it all together: Gently fold the whipped cream into the cream cheese mixture. Be careful not to overmix—you want to keep it light and fluffy. This is the creamy layer that makes this dessert so dreamy.
- Assemble and chill: Spread the creamy mixture over your Oreo base, smoothing it out with a spatula. Crumble the remaining 4 Oreos and sprinkle them on top for that perfect finishing touch. Pop it in the fridge for at least 2 hours (though I like to leave it overnight for maximum flavor).
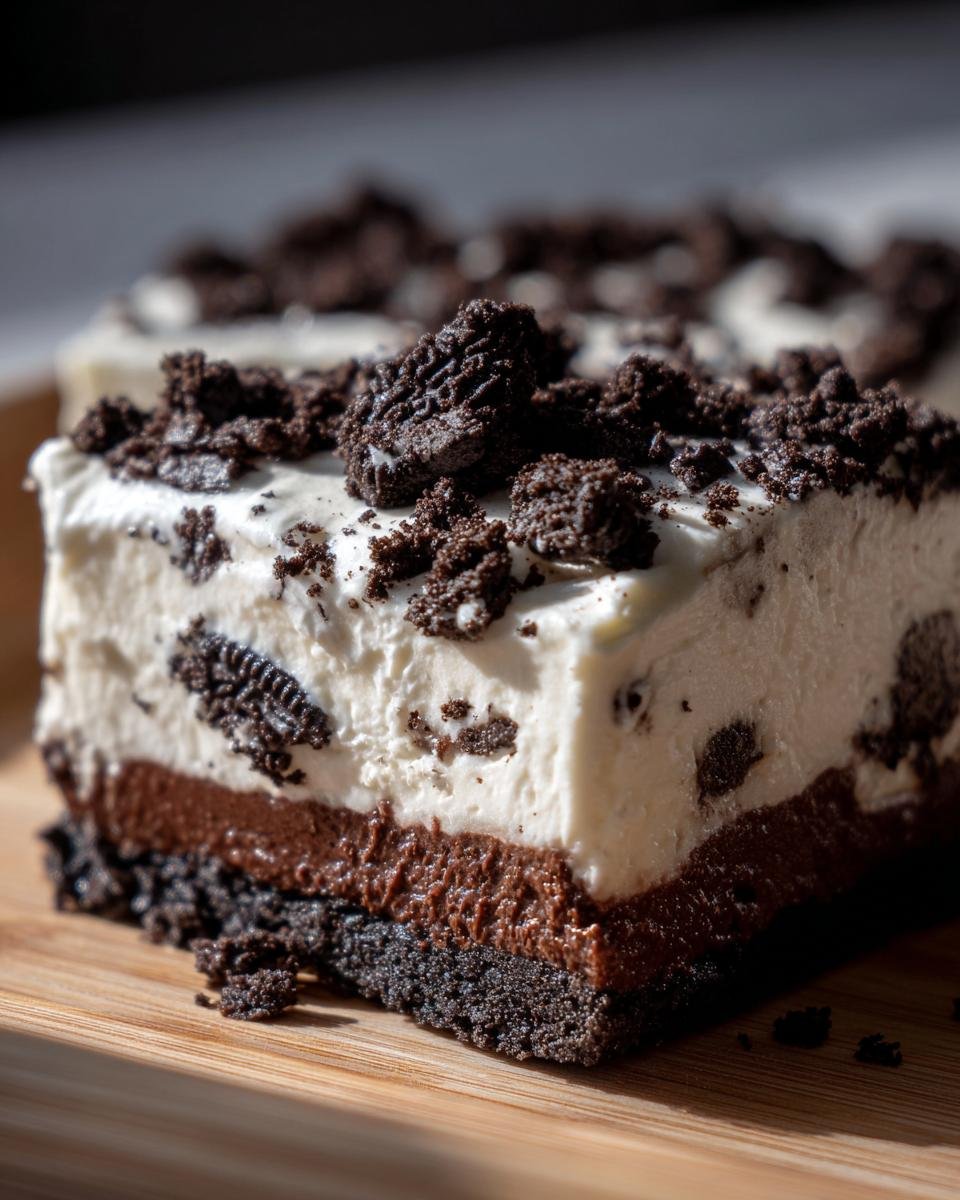
And that’s it! When it’s time to serve, just slice it up and watch everyone’s eyes light up. Seriously, this Oreo dessert is so good, it’ll disappear faster than you can say “more, please!”
Tips for the Perfect Oreo Dessert
Here are my hard-earned secrets for making this Oreo dessert absolutely foolproof:
- Room temp cream cheese is non-negotiable: Take it out at least an hour before – cold cream cheese leaves lumps no matter how long you mix!
- Chill everything for the whipped cream: Bowl, beaters, even the cream itself. Cold = perfect stiff peaks every time.
- Want next-level decadence? Add a thin chocolate ganache layer between the crust and cream – just melt chocolate with a splash of cream.
- For cleaner slices: Run your knife under hot water before cutting each piece.
- Make it ahead: This dessert actually tastes better after chilling overnight – the flavors really meld together.
Trust me, these little tricks make all the difference between good and “Oh my gosh, can I have the recipe?!”
Variations to Try with Your Oreo Dessert
Oh, the fun part – making this Oreo dessert your own! I’ve played with this recipe more times than I can count, and here are my favorite twists:
- Mint chocolate magic: Add 1/4 tsp peppermint extract to the cream layer – tastes just like those mint Oreos!
- Peanut butter paradise: Use peanut butter Oreos instead of regular, and swirl in 2 tbsp peanut butter with the cream cheese.
- Cookies and cream dream: Fold in 1/2 cup mini chocolate chips for extra crunch.
- Mocha madness: Mix 1 tbsp instant coffee into the powdered sugar for coffee lovers.
- Berry delicious: Top with fresh strawberries or raspberries right before serving.
The best part? You can mix and match these ideas – my kids love the peanut butter version with chocolate chips. Go wild and make it yours!
Serving Suggestions for Your Oreo Dessert
Now comes the best part – serving up this glorious Oreo dessert! I love cutting it into generous squares (about 2×2 inches) because, let’s be real, no one wants a tiny piece of this goodness. For a fancy touch, dust with extra powdered sugar or drizzle with chocolate sauce right before serving. Pair it with:
- A tall glass of cold milk (classic Oreo pairing!)
- Hot coffee or espresso for adults
- Fresh berries on the side for a pop of color
Pro tip: Let it sit at room temperature for 5 minutes before serving – the cream layer gets extra dreamy!
Storing and Reheating Your Oreo Dessert
Here’s the great news – this Oreo dessert actually gets better as it chills! Just cover your dish tightly with plastic wrap or transfer leftovers to an airtight container. It’ll keep happily in the fridge for up to 3 days (if it lasts that long!). No reheating needed – this treat is perfect straight from the fridge with its cool, creamy texture. I actually prefer it cold – those layers stay perfectly firm and refreshing!
Nutritional Information for Oreo Dessert
Just between us – while I love indulging in this Oreo dessert, I don’t obsess over the exact calorie count! Nutrition can vary based on specific ingredients and brands you use. That said, this is definitely a special occasion treat – rich, creamy, and totally worth every delicious bite. Enjoy it guilt-free in sensible portions!
Frequently Asked Questions About Oreo Dessert
I get so many questions about this Oreo dessert – here are the ones that pop up most often with my tried-and-true answers:
Can I use other cookies instead of Oreos?
Absolutely! While Oreos are classic, I’ve had great success with chocolate sandwich cookies like Hydrox or even golden Oreos for a vanilla twist. Just make sure they’re similar in size so your crust-to-filling ratio stays perfect.
Can I make this dessert ahead of time?
You bet – in fact, I recommend it! This dessert tastes even better after chilling overnight. The flavors meld together beautifully, and the texture becomes wonderfully firm. Just keep it covered in the fridge for up to 3 days.
Why is my cream cheese mixture lumpy?
Ah, this usually means your cream cheese wasn’t soft enough. Next time, leave it out for a full hour (or microwave for 10-15 seconds if you’re in a pinch). And always beat it alone before adding other ingredients – that’s my secret for silky smooth filling!
Can I freeze this Oreo dessert?
Technically yes, but the texture changes a bit. The cream layer becomes more icy than creamy. If you must freeze, wrap it tightly and thaw in the fridge overnight before serving.
Share Your Oreo Dessert Experience
I’d love to hear how your Oreo dessert turns out! Did you try any fun variations? Maybe your kids helped crush the cookies? Leave a comment below with your experience – and don’t forget to snap a photo before it disappears! Tag me on social media so I can see your delicious creations. Happy baking!
Print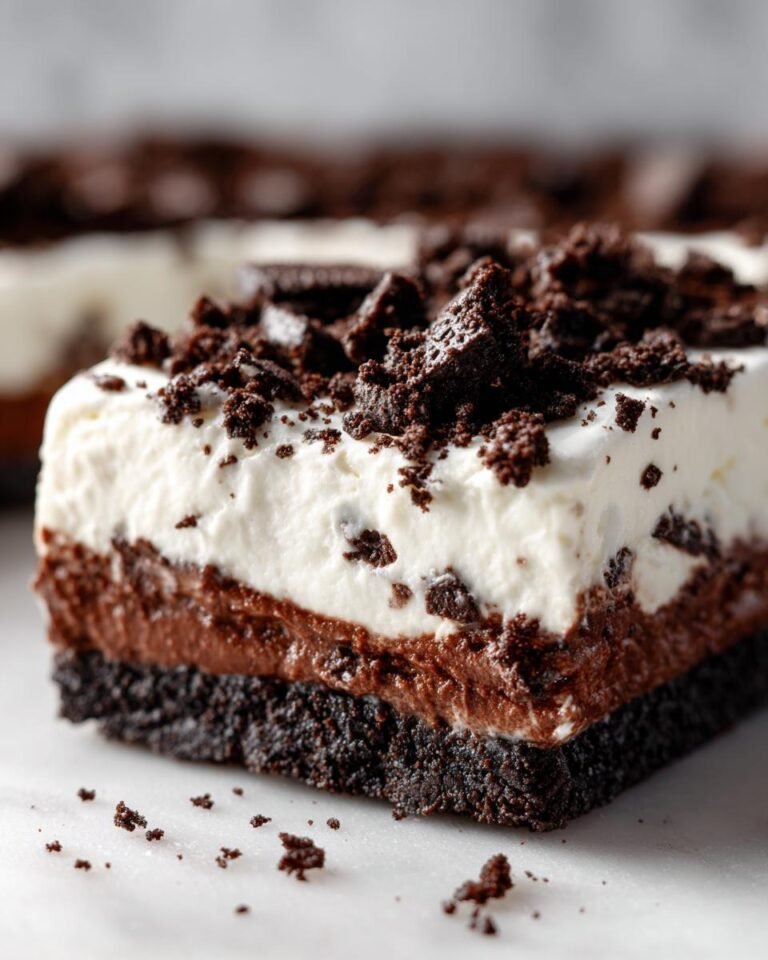
Irresistible 24-Oreo Dessert That Steals Hearts Instantly
A quick and delicious dessert using Oreo cookies, perfect for any occasion.
- Total Time: 2 hours 20 minutes
- Yield: 8 servings 1x
Ingredients
- 24 Oreo cookies
- 1 cup heavy cream
- 1/2 cup powdered sugar
- 1 tsp vanilla extract
- 1/2 cup cream cheese
Instructions
- Crush 20 Oreo cookies into fine crumbs.
- Mix the crumbs with melted butter and press into a dish to form the base.
- Whip the heavy cream until stiff peaks form.
- Beat the cream cheese, powdered sugar, and vanilla together until smooth.
- Fold the whipped cream into the cream cheese mixture.
- Spread the mixture over the Oreo base.
- Crumble the remaining 4 Oreo cookies and sprinkle on top.
- Chill in the refrigerator for at least 2 hours before serving.
Notes
- Ensure the cream cheese is at room temperature for smoother mixing.
- You can add a layer of chocolate ganache for extra richness.
- Prep Time: 20 minutes
- Cook Time: 0 minutes
- Category: Dessert
- Method: No-Bake
- Cuisine: American
- Diet: Vegetarian
Nutrition
- Serving Size: 1 slice
- Calories: 350
- Sugar: 25g
- Sodium: 200mg
- Fat: 20g
- Saturated Fat: 10g
- Unsaturated Fat: 8g
- Trans Fat: 0g
- Carbohydrates: 40g
- Fiber: 2g
- Protein: 4g
- Cholesterol: 40mg
Keywords: Oreo dessert, no-bake dessert, quick dessert, Oreo recipe