
There’s something magical about whipping up a simple dessert that fills your kitchen with warmth and sweetness. This recipe? It’s my go-to when I need a quick, delicious treat that feels like a hug in dessert form. I remember making it for the first time on a rainy afternoon with my mom—just a few basic ingredients, a little mixing, and boom! We had golden, buttery perfection in under an hour. No fancy techniques, no waiting around—just pure comfort in every bite. Whether you’re a baking newbie or a seasoned pro, trust me, this dessert will become your secret weapon too.
Why You’ll Love This Dessert
This isn’t just any dessert—it’s the kind of recipe that makes you feel like a kitchen hero with minimal effort. Here’s why it’s special:
- Crazy easy – Just one bowl and basic ingredients you probably have right now
- Lightning fast – From mixing bowl to oven in under 10 minutes
- Perfect texture – Golden outside, soft and tender inside (no dry cake here!)
- Endless variations – Dress it up with fruit, chocolate, or eat it plain
- Always a hit – Works for weeknight treats or last-minute guests
Seriously, this dessert solves all my “I need something sweet NOW” emergencies. The smell alone will have everyone hovering around your oven!
Ingredients for the Perfect Dessert
Here’s the beautiful part – you likely have everything you need for this dessert sitting in your pantry right now. No specialty ingredients, no last-minute grocery runs. Just simple, honest stuff that comes together like magic:
- 1 cup all-purpose flour – Spoon it in and level it off; no packing!
- 1/2 cup granulated sugar – I sometimes split this with brown sugar for caramel notes
- 1/4 cup butter – Must be at room temp (leave it out 30 minutes first)
- 1 large egg – Also room temp – it blends in so much better
- 1 teaspoon vanilla extract – The good stuff, not imitation
- 1/2 cup whole milk – 2% works in a pinch but whole makes it extra rich
- 1 teaspoon baking powder – Make sure yours is fresh (test it if it’s been open awhile)
That’s it! Seven simple ingredients that transform into something way greater than the sum of their parts. I’ve made this dessert at midnight with half-asleep measurements and it still turns out – that’s how forgiving it is.
Essential Equipment for Making This Dessert
Here’s the thing—this dessert is so simple, you probably already have everything you need in your kitchen. No fancy gadgets required, just the basics. Here’s what I use every time:
- 1 mixing bowl – Medium-sized is perfect; no need to haul out the giant one
- Measuring cups and spoons – For those precise (or not-so-precise) measurements
- Whisk or wooden spoon – I grab whatever’s closest—both work like a charm
- 8×8 inch baking dish – Glass or metal, just grease it well so nothing sticks
- Oven – Preheated to 350°F (175°C), of course
- Toothpick or cake tester – For that all-important “is it done?” check
That’s it! No stand mixer, no special pans, just straightforward tools that make this dessert a breeze. I’ve even made it in a pie dish once when my baking dish was MIA—it still turned out amazing. Flexibility is key!
How to Make This Delicious Dessert
Okay, here’s where the magic happens! Making this dessert is seriously foolproof—I’ve done it half-asleep on busy weeknights and it still turns out amazing every time. Just follow these simple steps:
Step 1: Prepare the Batter
First things first—preheat that oven to 350°F (175°C). While it’s warming up, grab your mixing bowl and whisk together the flour, sugar, and baking powder. Now here’s my little secret: when you add the butter (make sure it’s that perfect room-temperature softness!), don’t just dump it in. Cut it into small chunks first—they’ll blend into the dry ingredients way easier.
Next, crack in the egg (room temp too—trust me on this), pour in the vanilla and milk, and stir just until everything comes together. A few lumps? No sweat! They’ll disappear in the oven. The batter should be thick but pourable—like pancake batter but a bit denser. Too thick? Add a splash more milk. Too runny? A sprinkle more flour. This dessert is super forgiving!
Step 2: Bake to Perfection
Pour that beautiful batter into your greased baking dish and pop it in the oven. Now the hard part—waiting! Set your timer for 25 minutes, but don’t wander off just yet. At around 20 minutes, your kitchen will start smelling like heaven. That’s your cue to start peeking.
Here’s how I test for doneness: insert a toothpick near the center. If it comes out with a few moist crumbs clinging to it—perfect! If it’s wet, give it another 3-5 minutes. The edges should be golden brown and pulling slightly away from the pan. Remember, this dessert continues cooking a bit as it cools, so don’t overbake it.
Step 3: Serve and Enjoy
Let the dessert cool for at least 10 minutes before diving in—I know, torture! But this resting time lets the texture set up perfectly. Then? Get creative! My family loves it warm with a scoop of vanilla ice cream melting over the top. Fresh berries? Yes please! A dusting of powdered sugar? Classic. Or just grab a fork and enjoy it plain—it’s that good.
Pro tip: If you want to be fancy, cut it into squares while still slightly warm. The edges get this irresistible crispy-chewy texture that’s absolutely to die for. And if there are leftovers (big if!), they make an amazing breakfast. Not that I’d know anything about that…
Tips for the Best Dessert
After making this dessert more times than I can count (okay fine, I’ve lost track after 50+ batches), I’ve picked up some foolproof tricks that take it from good to “oh-my-goodness-what-is-this-magic” level. Here are my can’t-live-without tips:
Room temp is everything – I know I sound like a broken record, but cold butter and eggs just won’t blend right. Take them out at least 30 minutes before baking—or if you’re impatient like me, place cold eggs in warm water for 5 minutes!
The toothpick lie detector – That toothpick test? Don’t trust just one poke. Check a couple spots, especially if your oven has hot zones like mine. And remember—a few moist crumbs are perfect, while wet batter means more time needed.
Grease like you mean it – Nothing worse than your beautiful dessert sticking to the pan. I use butter and a light flour dusting, or for extra insurance, line the bottom with parchment paper. Pro tip: skip the cooking spray—it can sometimes make edges tough.
Altitude adjustments – Living up high? Reduce baking powder to 3/4 tsp and add an extra tablespoon of milk. The first time I forgot this, my dessert looked like the Leaning Tower of Pisa!
Resting is key – I know it’s tempting to dig in immediately, but letting the dessert cool for 10-15 minutes lets the texture set up perfectly. The wait makes that first bite even more magical.
Bonus secret: This dessert actually gets better the next day (if it lasts that long!). The flavors meld together beautifully overnight. Just cover it with foil at room temp—no refrigeration needed unless you’ve added fresh fruit toppings.
Ingredient Substitutions for Your Dessert
Look, I get it—sometimes you’re staring into your pantry and realize you’re missing an ingredient. No panic needed! This dessert is incredibly flexible. Here are all the swaps I’ve tested that actually work (and a few I learned the hard way to avoid):
- Out of milk? Any dairy or non-dairy milk works great—I’ve used almond, oat, even coconut milk in a pinch. Just know coconut will add a subtle flavor (which can be delicious!). In a real bind, water works too—just add an extra tablespoon of butter.
- Butter alternatives: Margarine or vegetable oil spread will work, but the texture won’t be quite as rich. For oil, use 3 tablespoons instead of 1/4 cup butter. My vegan friend swears by coconut oil, but reduce it to 3 tablespoons and expect a slightly denser crumb.
- Egg replacement: For each egg, mix 1 tablespoon ground flaxseed with 3 tablespoons water (let it sit 5 minutes first). Applesauce also works—use 1/4 cup per egg, but your dessert will be more cakey than tender.
- Flour options: Need gluten-free? Use a 1:1 gluten-free baking blend (I like Bob’s Red Mill). Whole wheat flour works but makes it denser—I do half all-purpose, half whole wheat for the best texture.
- Sugar swaps: Brown sugar gives a caramel twist (use packed 1/2 cup). Coconut sugar works 1:1 but makes the dessert darker. For liquid sweeteners like honey or maple syrup, reduce other liquids by 2 tablespoons per 1/2 cup sweetener used.
A word of warning—don’t try substituting the baking powder. I once used baking soda by accident and ended up with something resembling a volcanic eruption in my oven. Not my finest baking moment! The beauty of this dessert is how adaptable it is, so don’t be afraid to make it work with what you’ve got.
Storing and Reheating Your Dessert
Okay, let’s talk leftovers—though in my house, this dessert rarely lasts long enough to need storing! But when it does (miracle of miracles), here’s how to keep it tasting just-baked fresh:
Room temp storage: For the first day or two, just cover the baking dish with foil or transfer slices to an airtight container. No fridge needed! The texture stays perfect at room temperature. I sometimes place a piece of bread in the container—it helps absorb any excess moisture and keeps the dessert soft.
Refrigerating: If you need to keep it longer (up to 5 days), refrigerate in an airtight container. But here’s my trick—let it come to room temp before eating, or better yet, warm it slightly. Cold straight from the fridge makes it a bit dense.
Freezing magic: This dessert freezes beautifully! Wrap individual slices tightly in plastic wrap, then foil. They’ll keep for 2-3 months. Thaw at room temp for an hour or pop straight into the toaster oven for a warm treat.
Reheating tips: My favorite way to revive leftovers? 10 seconds in the microwave for that just-baked warmth. Or for crispy edges, place slices in a 300°F oven for 5-8 minutes. Pro tip: Sprinkle a few drops of water on top before microwaving to prevent drying out.
Honestly? Sometimes I think the day-old version tastes even better—the flavors have more time to mingle and develop. Not that I’d know from experience… okay fine, I may have “accidentally” made an extra batch just for next-day eating!
Nutritional Information for This Dessert
Okay, let’s be real – we’re not eating dessert for its health benefits! But I know some folks like to keep track, so here’s the scoop on what’s in each delicious serving of this treat:
- Calories: About 250 per slice (totally worth it!)
- Fat: 10g (6g saturated from that glorious butter)
- Carbs: 35g (15g from sugar – hey, it’s dessert!)
- Protein: 4g (surprising little nutrient boost)
- Sodium: 100mg (not bad for something so tasty)
Now listen – these numbers can change based on your specific ingredients. Used coconut sugar instead? Browned your butter first? Added chocolate chips (you rebel!)? All those tweaks will adjust the nutritional profile slightly.
My philosophy? Life’s too short to stress over dessert calories. Enjoy a reasonable portion (or don’t – no judgment here!), savor every bite, and maybe take an extra walk tomorrow. Balance, right?
Pro tip: If you’re watching sugar, try reducing it to 1/3 cup – the dessert will still be plenty sweet. Or go half sugar, half monk fruit sweetener. But honestly? Sometimes you just need the real deal.
Frequently Asked Questions About This Dessert
Over the years, I’ve gotten so many questions about this dessert—and I love that it sparks curiosity! Here are the most common ones I hear, along with my tried-and-true answers:
Q1: Can I use a different sweetener?
Absolutely! Brown sugar adds a caramel flavor, while coconut sugar gives it a deeper, almost molasses-like taste. If you’re using liquid sweeteners like honey or maple syrup, reduce the milk by 2 tablespoons to keep the batter from becoming too runny. Just avoid artificial sweeteners—they can mess with the texture.
Q2: How long does this dessert last?
At room temperature, it stays fresh for about 2 days if stored in an airtight container. In the fridge, it’ll last up to 5 days (though it might get a bit denser). For longer storage, freeze individual slices—they’ll keep for 2-3 months and taste amazing when thawed!
Q3: Can I make this dessert ahead of time?
Yes, and it’s actually one of my favorite make-ahead treats! Bake it the day before, let it cool completely, and store it covered at room temperature. The flavors meld together beautifully overnight. Just warm it slightly before serving for that fresh-from-the-oven feel.
Q4: What if I don’t have a baking dish?
No problem! I’ve made this dessert in everything from a pie dish to a cast-iron skillet. Just adjust the baking time—thinner layers bake faster, while deeper ones need a bit more time. Keep an eye on it and use the toothpick test to check for doneness.
Q5: Can I add mix-ins like chocolate chips or fruit?
Definitely! Fold in up to 1/2 cup of your favorite mix-ins after the batter is ready. Chocolate chips, fresh berries, or even chopped nuts all work beautifully. Just be careful with juicy fruits—they can make the batter too wet, so toss them in a bit of flour first.
Got more questions? I’m happy to help! This dessert is so versatile, and I love hearing how people make it their own. Happy baking!
Print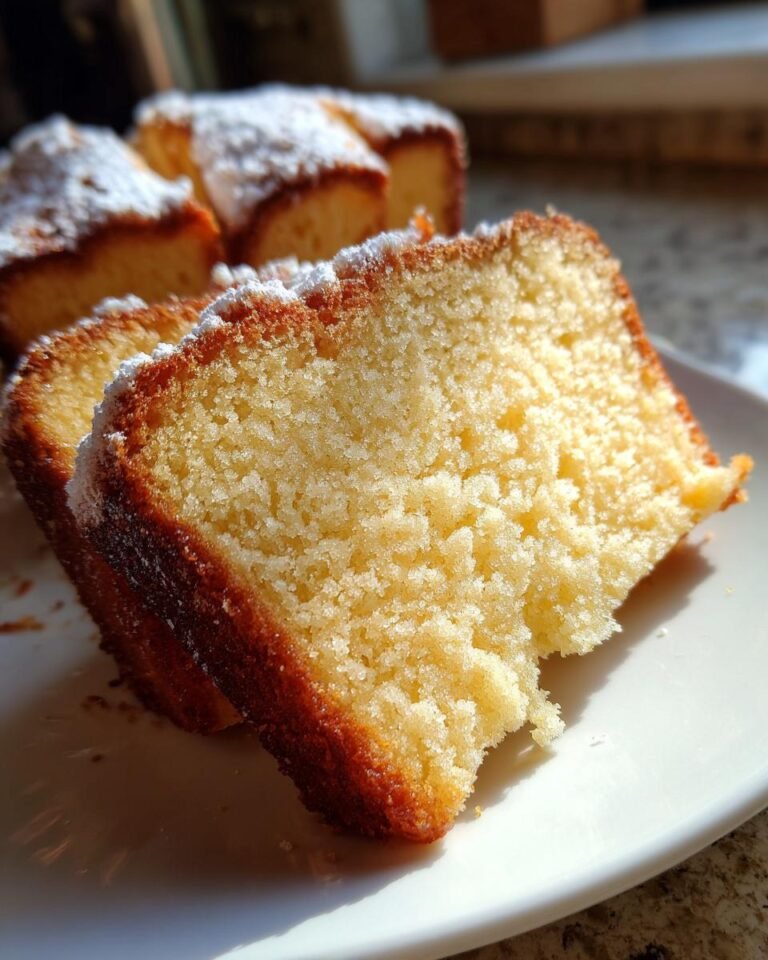
45-Minute Magical Dessert That Tastes Like Love
A simple and delicious dessert recipe that you can make at home.
- Total Time: 40 minutes
- Yield: 6 servings 1x
Ingredients
- 1 cup flour
- 1/2 cup sugar
- 1/4 cup butter
- 1 egg
- 1 tsp vanilla extract
- 1/2 cup milk
- 1 tsp baking powder
Instructions
- Preheat your oven to 350°F (175°C).
- Mix flour, sugar, and baking powder in a bowl.
- Add butter, egg, vanilla, and milk. Stir until smooth.
- Pour the batter into a greased baking dish.
- Bake for 25-30 minutes or until golden brown.
- Let it cool before serving.
Notes
- Use room-temperature butter for easier mixing.
- Check for doneness with a toothpick.
- Serve with whipped cream or ice cream if desired.
- Prep Time: 10 minutes
- Cook Time: 30 minutes
- Category: Dessert
- Method: Baking
- Cuisine: International
- Diet: Vegetarian
Nutrition
- Serving Size: 1 slice
- Calories: 250
- Sugar: 15g
- Sodium: 100mg
- Fat: 10g
- Saturated Fat: 6g
- Unsaturated Fat: 3g
- Trans Fat: 0g
- Carbohydrates: 35g
- Fiber: 1g
- Protein: 4g
- Cholesterol: 40mg
Keywords: dessert, easy, homemade, sweet